Ultimate guide to product photography: tips and techniques
As a seasoned product photographer, I’ve worked with countless clients who constantly strive for innovation in their respective industries. It’s been an exhilarating journey, and along the way, I’ve picked up numerous tips and techniques that have helped me to create compelling product images that captivate audiences and drive sales.
With rapid advancements in technology and increasingly discerning consumers, it’s never been more important to master the art of product photography - and that’s why I’m excited to share my ultimate guide with you. This comprehensive guide will delve into every aspect of product photography, from building your portfolio to mastering lighting techniques and editing tools that will elevate your work to new heights.
Whether you’re a beginner just starting or an experienced professional looking to hone your skills further, these tried and tested tips will provide invaluable insights as you navigate the ever changing landscape of today’s market. So buckle up, fellow creatives - it’s time to embark on an exciting adventure as we explore the limitless possibilities of product photography together.

Tips and techniques for mastering the essentials of product photography
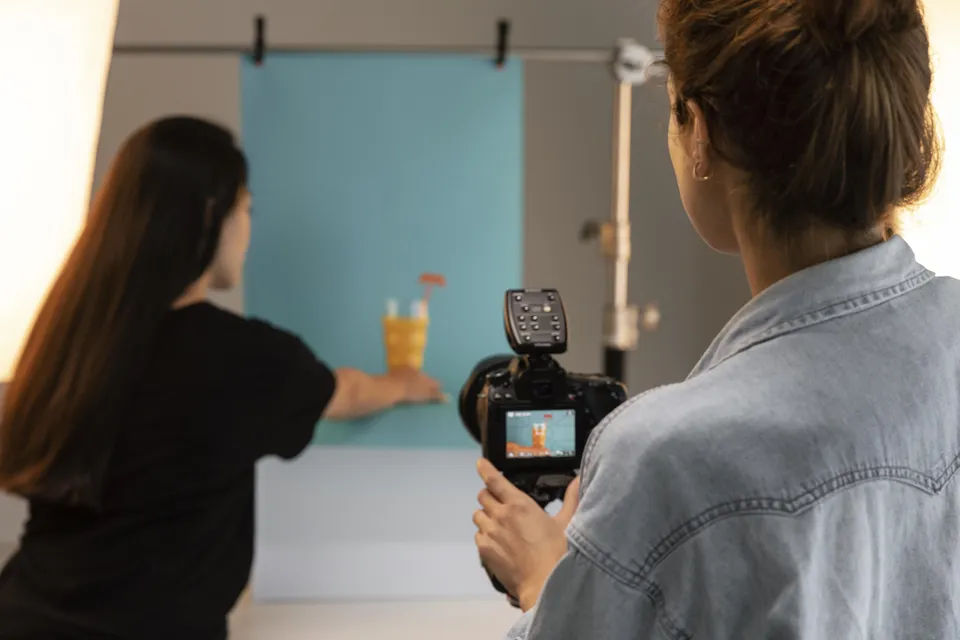
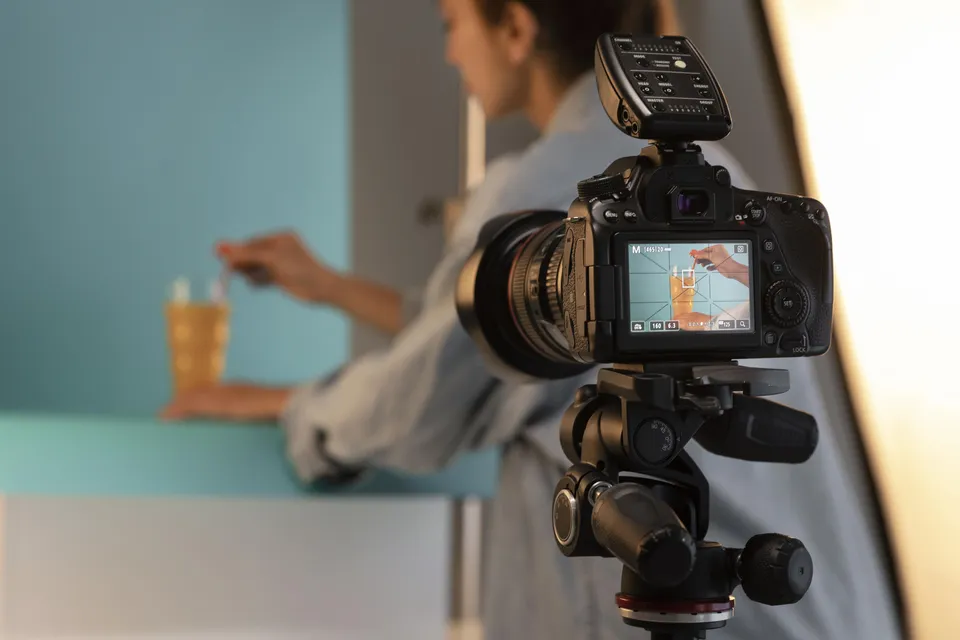
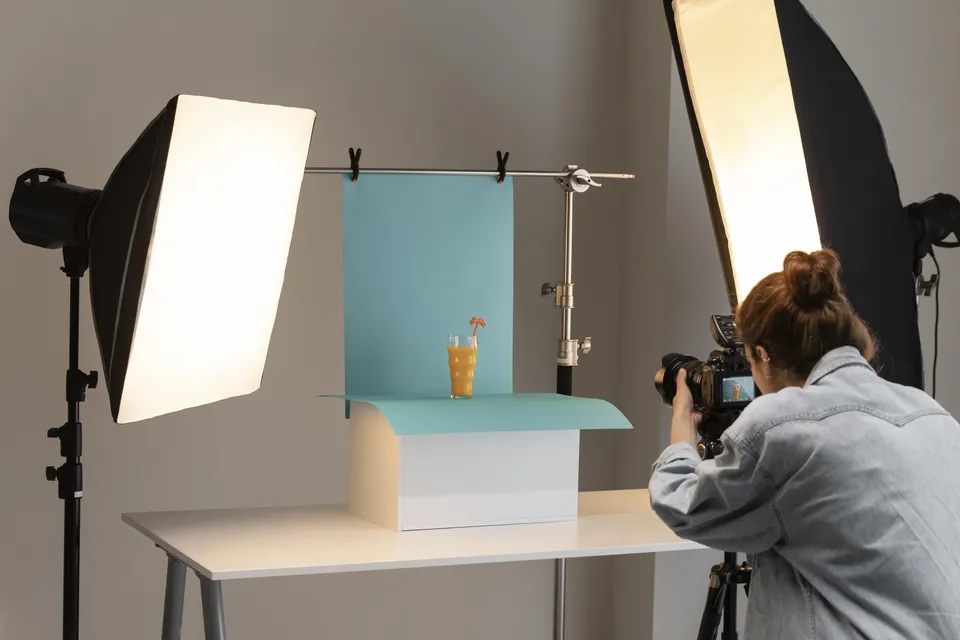
Let’s explore some essential tips and techniques to master capturing stunning product images. Achieving the best photos starts with choosing the right equipment and camera app. Invest in a DSLR or mirrorless camera for high results. Still, even your smartphone can deliver great images when paired with a powerful camera app if you’re photographing on a budget. Lighting is also crucial - aim for a well lit environment or invest in an affordable lighting kit to ensure consistent brightness and color accuracy. Jewelry photography deserves special attention due to its reflective nature and small size. To capture those intricate details, use a macro lens that allows you to get up close without compromising clarity. A tripod is also essential for stability during these close-up shots. Experiment with different backgrounds like velvet or acrylic to create contrast between the jewelry and its surroundings. Remember to enhance your images after the shoot with photo editing software like Lightroom or Photoshop. Regarding editing tools, plenty of options are available for beginners and professionals alike. Beginners can start with free photo editors software like GIMP or Canva, while more advanced users might prefer Adobe’s suite of products, such as Lightroom and Photoshop. Regardless of which program you choose, familiarise yourself with essential functions like cropping, adjusting exposure levels, removing blemishes, and applying filters before diving into more complex edits such as retouching jewelry photo editing. Incorporating these tips into your product photography will significantly elevate your work’s quality. As you refine your skills through practice and experimentation, building an impressive portfolio becomes inevitable, paving the way toward success in this field. So go ahead, grab your camera (or phone), set up shop at home, or take advantage of local studio spaces available for rent. Anything goes when it comes to honing your craft! Once armed with an array of stunning product images, you’ll be well on your way to creating a stunning product photo portfolio that showcases your unique style and expertise.
A step by step guide to building your product photo portfolio
Ready to showcase your skills and build an impressive product photo portfolio? Let’s dive into a step by step guide to get you on the right track. Building a great product photo portfolio is essential for anyone looking to break into professional photography. With the increasing demand for high quality images on ecommerce websites, having a well curated collection of your work can make all the difference when it comes to landing clients. To create a top notch portfolio, consider these five tips:
- Choose your niche - focus on one or two areas of product photography, like fashion or jewelry photo editing, to showcase your expertise.
- Invest in quality equipment - high end cameras and lighting setups will help you quickly capture stunning images.
- Experiment with different techniques - be creative and try various shooting styles and angles to create eye catching visuals.
- Stay consistent across projects - whether working with a jewelry retouching service or using photo editing tools, ensure your style remains cohesive throughout your entire portfolio.
- Include personal and commissioned work - show potential clients you have experience working on self initiated projects and assignments from previous customers.
By following this ultimate guide to product photography tips and techniques, you’ll be able to hone your skills while building a compelling body of work. In addition to showcasing the range of products you can shoot, from fashion items like clothing and accessories to smaller pieces like jewelry, remember to demonstrate your proficiency in professional editing services. This will not only give prospective clients confidence in your abilities but also provide them with a glimpse into how their products may look after undergoing similar treatment.
As you refine your craft and add new projects to your portfolio, always keep innovation at the forefront of everything you do. Experiment with emerging trends in post-production processes, such as advanced jewelry retouching service techniques or cutting edge photo editing tools designed specifically for ecommerce websites. By staying ahead of the curve, you’ll impress clients, land more work, and help shape the future of product photography, one stunning image at a time.
The need for professional product photography in today’s market
You might be wondering why professional product photography is in such high demand, so let’s dive into its importance in today’s market. With the rise of e-commerce and social media platforms, businesses constantly compete for attention and engagement from potential customers. This has led to an increased need for visually appealing images that showcase products and tell a story about the brand. In this ultimate guide to product photography, we’ll share tips & techniques that can help you create stunning visuals for your business. One key aspect of professional product photography is jewelry photo editing, which involves using specialized tools and techniques to enhance the appearance of jewelry items in photographs. Jewellery is often tiny and intricate, making it difficult to capture every detail accurately. Therefore, hiring a professional photo retoucher specializing in jewelry photo editing can significantly improve the quality of your images by removing imperfections and enhancing the overall look of your pieces. Photo retouching services can also be used for other products, ensuring each looks its best before being showcased online or in print. In addition to hiring professionals for jewelry photo editing or other photo retouching services, you may also choose to invest in a good photo editor app as part of your toolkit. These apps offer editing features that allow you to fine tune your images quickly and easily without extensive knowledge of advanced editing techniques. A reliable photo editor app can save you time while helping maintain consistency across all your product photos. As more consumers turn to online shopping options due to their convenience and the wide variety of choices available at their fingertips, it has become increasingly crucial for businesses to ensure their products stand out among competitors through compelling visuals created with professional product photography tips and techniques discussed in this guide. Investing in high quality imagery and understanding how different elements like lighting, composition, and background choice contribute towards creating eye catching pictures that directly target the audience’s needs and wants preferences, companies better position themselves to attract potential customers and ultimately increase sales revenue.
Editing techniques and tips for creating compelling product images
The ultimate guide to product photography emphasizes the importance of creating compelling product images that help you stand out in today’s competitive market. It starts with capturing high quality raw images, but the real magic happens during post processing. Let’s dive into some primary editing techniques and tips to make your product images irresistible. In this section, I’ll share my experience and knowledge on enhancing your photos using various tools such as photo editing apps, Adobe Photoshop, and even outsourcing to a retouching company such as ourselves. One crucial aspect of jewelry photo editing is color correction. Since jewelry items often have reflective surfaces and intricate details, it’s essential to ensure accurate colors by adjusting white balance, saturation, and hue. This can be done using Adobe Photoshop or other photo editing apps like Lightroom or Capture One. Another essential step in creating stunning product images is background removal. A clean white or transparent background allows your products to take center stage without distractions. You can achieve this effect through manual selection tools such as Adobe Photoshop. Retouching is vital in making your product images look polished and professional. Techniques like the spot healing brush tool (to remove dust particles), dodge and burn (for enhancing shadows or highlights), and frequency separation (for improving textures) can elevate your image quality significantly. If you lack time or expertise in these areas, consider hiring a reputable retouching company specializing in product photography enhancements.
Product photography tips for beginners and getting started in the studio
If you’re eager to dive into the world of product photography and transform your studio space into a realm of creativity and success, let’s unlock its full potential together! As a beginner, investing time and effort in honing your skills is essential. Becoming proficient in using Adobe Lightroom, Photoshop, and other photo editing software or services is crucial for producing stunning images that captivate your audience. From jewelry photo editing to color correcting product images, perfecting these tools will significantly impact the quality of your work. To make sure you’re on the right track from the start, here are three critical tips for getting started in the studio:
- Lighting - ensure adequate lighting equipment, such as softboxes or umbrella lights, to create an even light distribution in your product photos. This will accentuate their details and help with tasks like jewelry retouching later.
- Equipment - invest in a good quality camera and lens that can capture sharp images with minimal distortion. Also, consider investing in accessories like tripods or light stands for added stability during shooting sessions.
- Backgrounds - choose clean, simple backgrounds (such as white or neutral colors) for most products. This makes removing the background using tools like clipping paths easier during post processing.
As you progress through various projects, be prepared to experiment with techniques such as focus stacking or playing around with exposure settings. Keep learning by reading articles online about specific genres within product photography (such as jewelry photo editing) or attending workshops led by experienced professionals.
Continually challenge yourself to think outside the box when faced with new challenges. Creative problem solving often sets great photographers apart from good ones.
A guide to capturing great product shots using the art of aperture
Perfecting the art of aperture is vital in creating visually stunning product shots that leave a lasting impression on your audience. The right combination of tips and techniques will help you capture perfect and attractive images, especially for jewelry photographs. In this section, we’ll delve into the art of aperture and how it can be used effectively to enhance your product shots. First, let’s understand what aperture is. Aperture refers to the opening in a camera lens through which light passes to enter the body. It controls the amount of light entering the camera and affects the depth of field, which is crucial for capturing sharp and detailed professional jewelry images. To achieve optimal results in your jewelry photo editing process, experiment with different apertures (usually denoted by f stop numbers) until you find one that gives you sufficient brightness and an appropriate depth of field. In addition to understanding aperture settings, utilizing editing features available through various photo editor apps can further elevate your jewelry photographs. These apps offer tools to adjust brightness levels, contrast ratios, color saturation, and other aspects essential for perfecting jewelry images. Please don’t shy away from post production enhancements as they are vital for ensuring that your final image showcases every detail of the professional jewelry piece while remaining true to life. As you continue mastering the art of aperture in product photography, remember that practice makes perfect. Refine your skills by taking multiple shots using different apertures and adjusting them during post processing until you consistently achieve those great product shots. With dedication and persistence, these tips and techniques will give you complete control over capturing visually striking images that stand out among competitors’ offerings online or in print catalogs.
Product photography lighting techniques to create the perfect white background
Achieving a flawless white background in your jewelry shots might seem like searching for a needle in a haystack, but with the proper lighting techniques, it’s easier than you think. In this section, we’ll discuss essential tips and techniques that will help you create perfect white backgrounds without spending hours on photo editing and retouching. By understanding how light interacts with your products and the environment, you can capture stunning images that showcase your jewelry in its best light.
Firstly, consider investing in a lightbox or creating one using translucent materials such as white fabric or plastic sheets. This simple setup allows for even light distribution around the product, eliminating harsh shadows and overexposure. Place your jewelry inside the lightbox and position two continuous lights on either side at approximately 45 degree angles pointing towards the center of the box. The soft, diffused lighting creates an evenly lit environment ideal for capturing clear images of your jewelry pieces.
Another critical aspect of achieving a perfect white background is adjusting your camera settings accordingly. Experiment with different aperture settings (lower f numbers will provide better depth of field), shutter speeds (faster speeds freeze motion while slower speeds can cause blurring), and ISO levels (higher numbers result in more noise). Remember that higher quality cameras often produce better results when minimizing noise and maintaining detail in bright areas of an image. By following these lighting techniques and adjusting camera settings accordingly, you’re well on your way to capturing new images of your jewelry products against a flawless white background. But don’t stop there - optimize those photos by incorporating lifestyle shots and crafting compelling product listings to maximize their potential as marketing tools.
Using lifestyle shots and product listings to make the most of your product photos
Now that you’ve got those stunning product photos let’s amp up their impact with lifestyle shots and optimized product listings! Lifestyle shots showcase your products in real life situations, helping potential buyers envision themselves using them. A well executed lifestyle shot showcases your product and tells a story that evokes an emotional response from viewers. These images go beyond simple white backgrounds and incorporate props, models, or environments that complement your products. For example, if you sell handmade bracelets, consider showing them worn by a model in a trendy outfit or placed on a rustic wooden surface. Optimized product listings ensure that your target audience can easily find and understand the unique features of your products. Include clear and concise descriptions of each item’s features and benefits in your online store or marketplace listing. Incorporate relevant keywords without overstuffing as too many repetitive phrases can make it difficult for search engines (and customers) to understand your offering. After capturing perfect images through tips and techniques like lighting adjustments and proper positioning of objects within the frame, enhance them further with photo editing tools like jewelry photo editor apps or professional software suites for more advanced requirements. Post production editing is a crucial step in perfecting your product photos. By making the most of your product photos through the creative use of lifestyle shots and detailed product listings, you’ll provide potential customers with all the information they need to decide whether they want to buy from you. Entice them with beautiful imagery and compelling narratives about how these items will fit into their lives. Don’t just stop at perfecting camera settings - combine technical prowess with storytelling skills to create unique visual content that resonates with your audience.
Summary
Perfecting product photography takes time, patience, and practice. But with the right tips and techniques, you’re well on your way to creating stunning images that capture attention and drive sales. Don’t be afraid to experiment with different lighting setups, editing techniques, and styles. Remember, it’s through trial and error that we perfect our craft. So keep pushing yourself to improve, and watch as your product photos reach new heights of success.
Ecommerce and product photography tips for beginners FAQs
What is ecommerce photography?
Ecommerce photography is the art of taking high quality photographs of your products to showcase them on your online store, website, or social media pages. It is an essential aspect of online selling, as it helps to attract potential customers and increase sales.
Why is product photography important?
High quality product photography is crucial as it can affect how your customers perceive your products. When shoppers view your items, the images must convey professionalism, quality, and attention to detail. Good product photography can impress potential buyers and improve their chances of purchasing.
Do I need a professional photographer for ecommerce product photography?
No, you don’t need a professional photographer for ecommerce product photography. Professional photographers have the experience, tools, and knowledge to take the best shots of your products. You can teach yourself with the right tools and resources. However, it is always advisable to seek professional help if you have the budget.
How can I learn product photography?
You can learn product photography through online courses, videos, blogs, books, and tutorials. Several resources are available for beginners and advanced learners, depending on your level of interest in photography.
What are the essential tools needed for product photography?
The essential tools for product photography are a camera, a tripod, a lighting setup, and a backdrop. Additional items might include reflectors, diffusers, and props to enhance your product looks. You may also need editing software and a computer to edit your photos.
What is natural light, and why is it essential in product photography?
Natural light comes from the sun and is used in photography to produce soft shadows, warmer tones, and a more natural look. It is essential in product photography as it can make your products appear more appealing and enhance their best features.
Can I use artificial light for product photography?
Yes, you can use artificial light for product photography. Artificial light is often used in photography studios to control the light source and create a more consistent look and feel for your images. However, using the correct type of artificial light is essential, ensuring the light source is well-positioned for optimal results.
How can I take the perfect product photograph?
To take the perfect product photograph, you need to keep a few key elements in mind. These include lighting, composition, focus, and post-processing. It’s also important to pay attention to the product details and showcase the best features of your products.
How can I use my product photos?
You can use your product photos in various ways, such as on your online store, website, social media pages, advertising, product descriptions, and packaging. You can also use them as a reference when designing or creating new products.
How can I optimize my product photos for file size and speed?
You can optimize your product photos by resizing them to the appropriate size for your specific platform or device. You can also compress your images using specific methods or software that reduces file size and maintains the quality of the image. Shopify, for example, automatically optimizes the file size of your images when you upload them to your store.